Field Guide
Glide Baits
Big-profile hard swimbaits that draw quality fish from clear-water targets.
Confidence
Situational
Belews · Summer
Gear
Rod
Swimbait — 7'6–8'0" H / Mod-Fast
Reel
Casting · 200–300-size · 6.2:1–7.4:1
Line
17–25 lb Fluorocarbon (tied direct · San Diego Jam)
60-Second Refresher
When to Throw
Good Water
Clear to lightly stained water, wind or chop, pre-spawn / post-spawn fry guarding / shad spawn / bluegill / fall baitfish, steep banks, points, docks, isolated wood next to deeper water.
Bad Water
Muddy water where bass can't track it, heavy brush or thick grass where exposed trebles hang constantly, dead-still high-pressure days where every fish follows but refuses.
Bait Selection
Beginner · All-Around · Slow Natural · Wide Search
Pick by glide style — wide, chopper, or slow natural
Start in Bone or Pearl Bone so you can see the bait and learn the cadence. Use a chopper around docks and followers. Use a slow natural for high-percentage targets and bigger profiles. Use a traditional wide glide to cover points and bank lines.
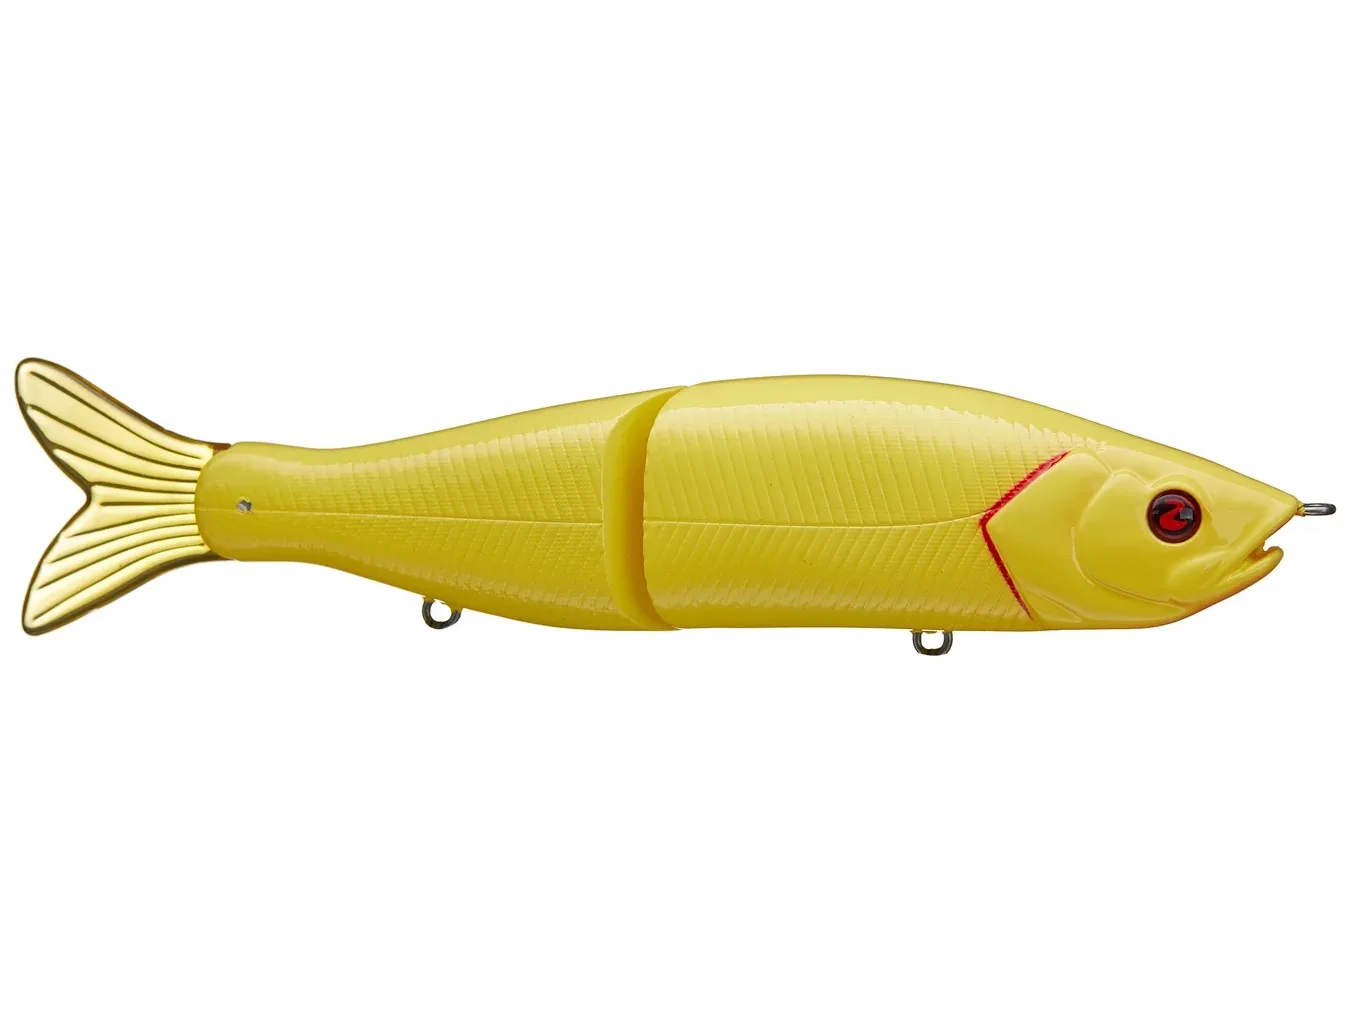
River2Sea S-Waver 168S (Wide Glide)
Bone — 6.75"1-5/8 oz
Beginner / bank lines, points, shallow cover
Proven entry glide for learning wide sweeps
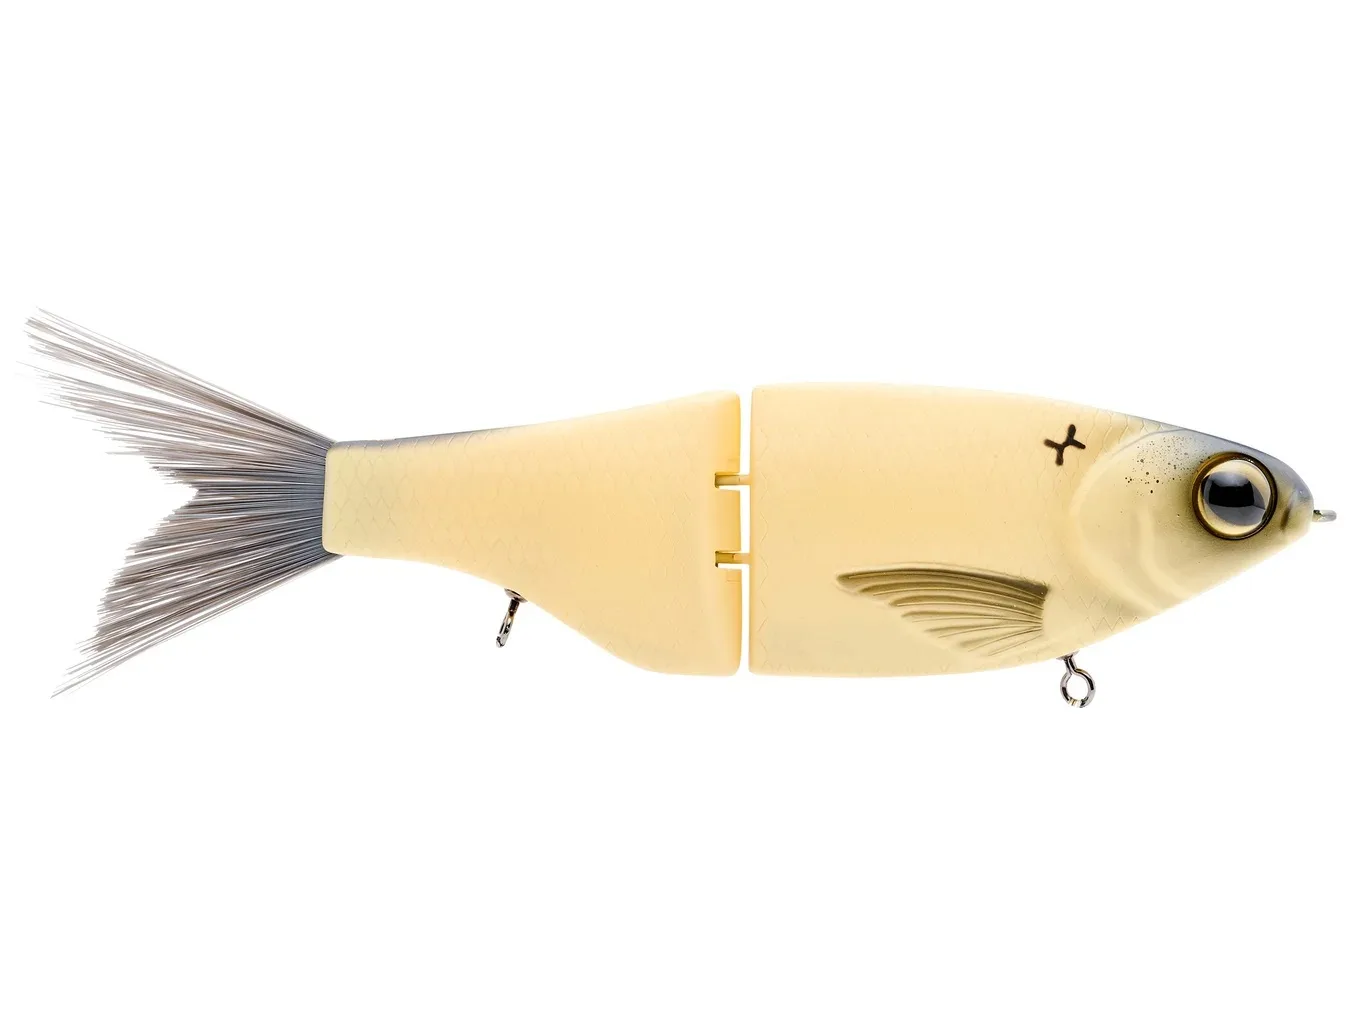
SPRO KGB Chad Shad 180 (Chopper)
Bone — 7"2.4 oz
All-around: glides, chops, turns hard around targets
Best do-most-things choice
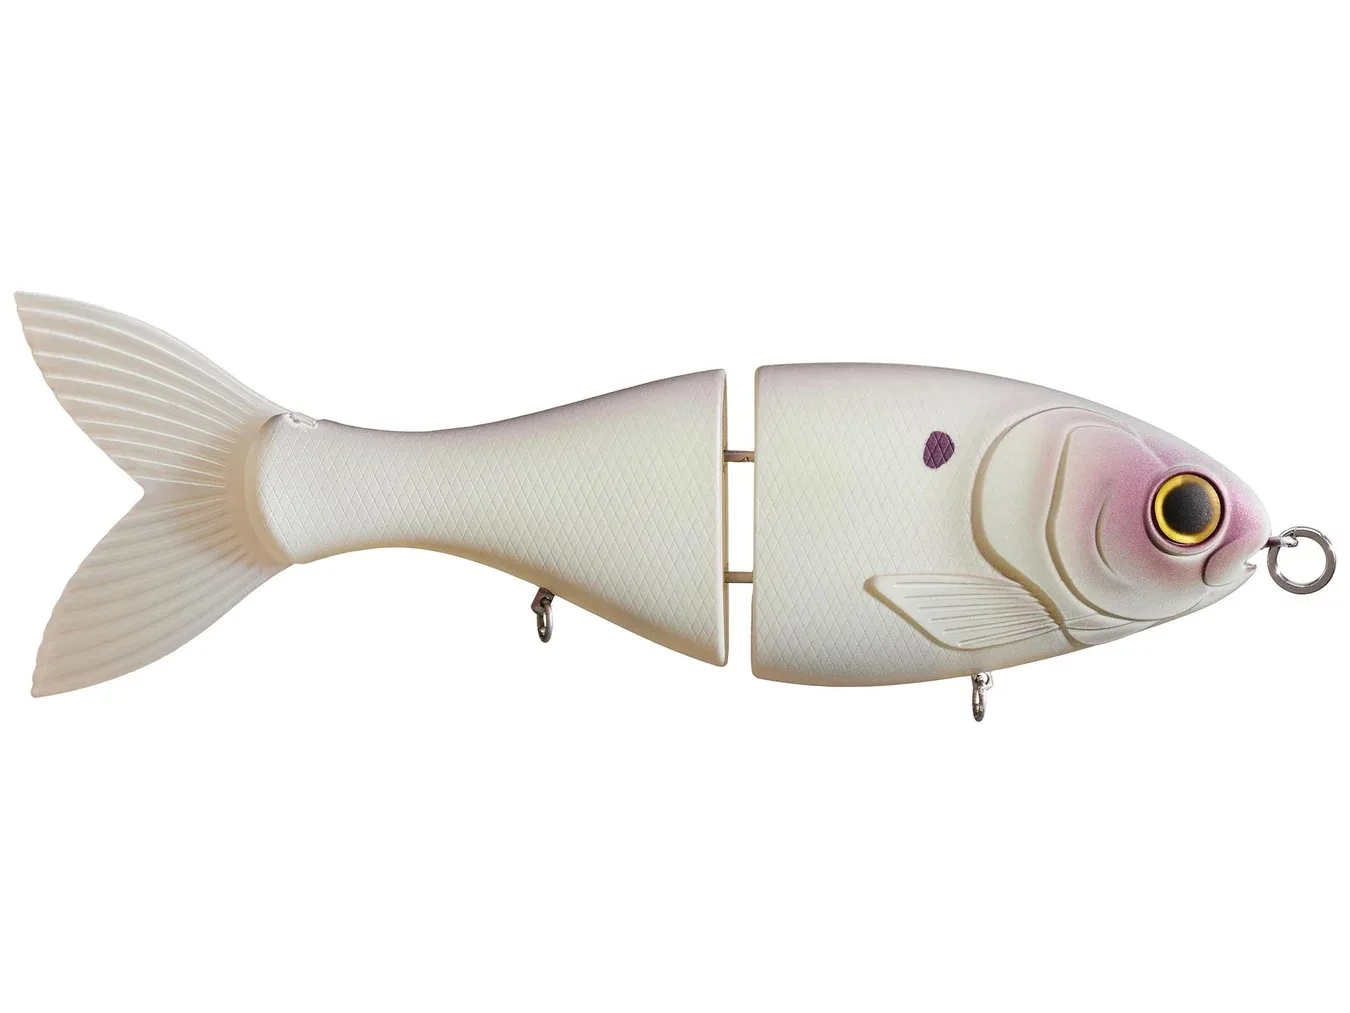
Bucca Brand Trick Shad (Slow Natural)
Pearl Bone — 8"3 oz
Bigger draw, posture-based action, deliberate presentation
Quality-fish target bait
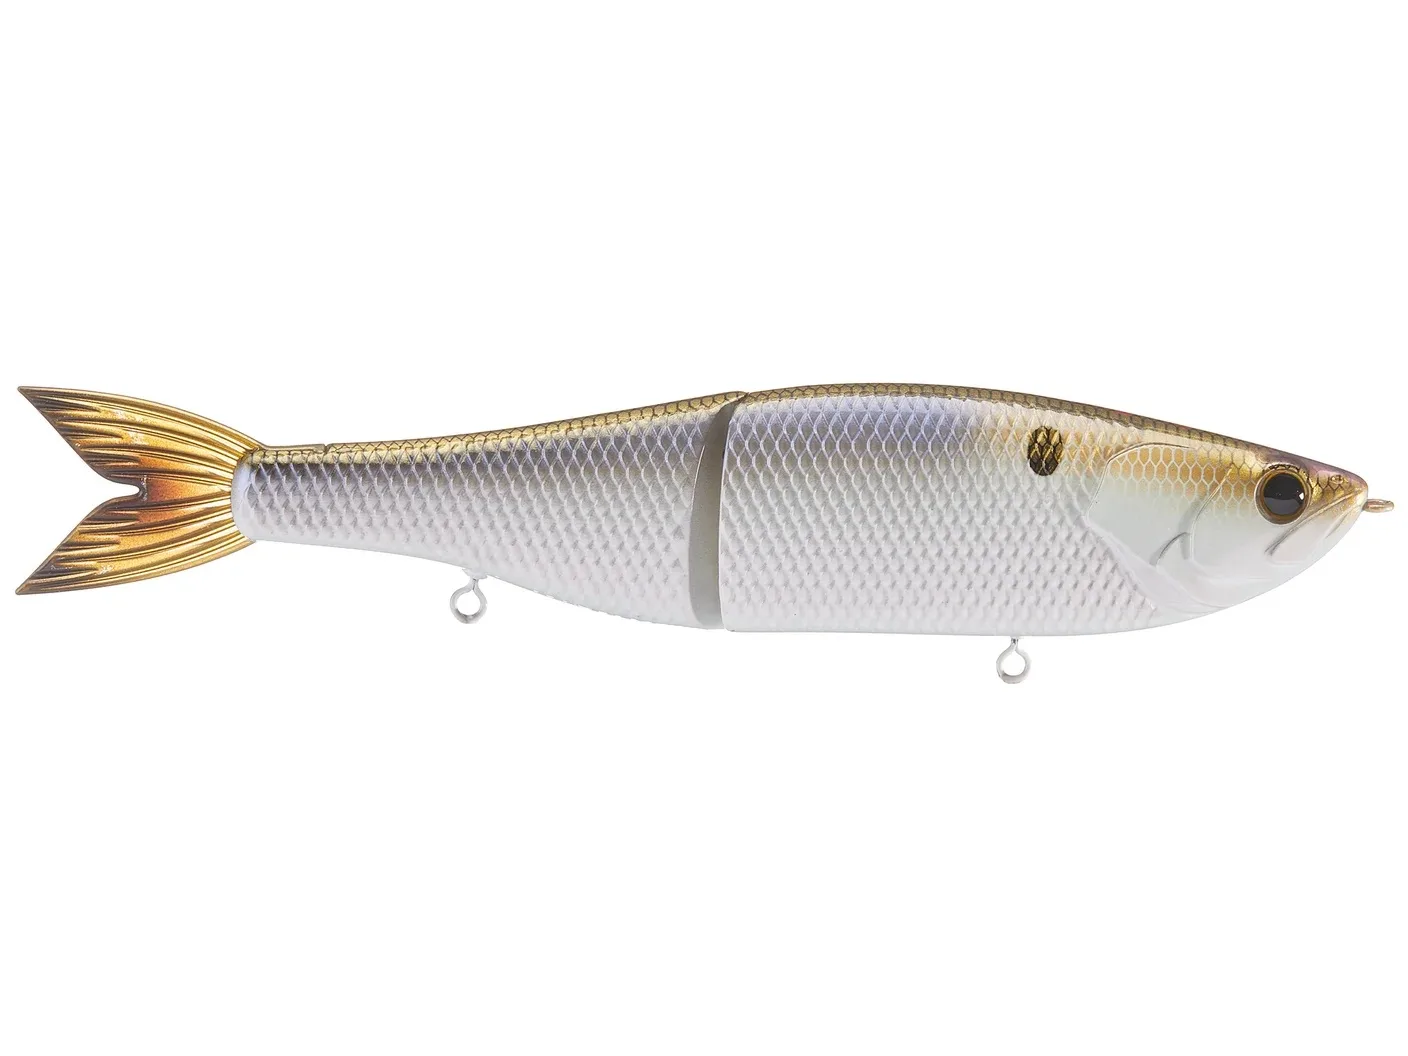
6th Sense Draw FS (Wide Glide)
4K Shad — 6.5"1.5 oz
Covering points, grass edges, bluff banks, open lanes
Fast-sinking shad glide
Wide Glide Retrieve
Reel-tight · slack · repeat
Cast past the target. Reel until the line loads the joint and starts the bait off to one side. Give it slack so it keeps gliding instead of pulling straight. Repeat slowly: reel-tight, slack, reel-tight, slack — that's the clean side-to-side sweep.
Chopping Retrieve
Underwater walking bait
Use quick quarter-turns of the reel or tight rod-tip twitches to kick the bait side to side. Each pop needs immediate slack so it pivots instead of sliding forward. If a fish follows, don't freeze — chop faster or pull it away like a fleeing baitfish.
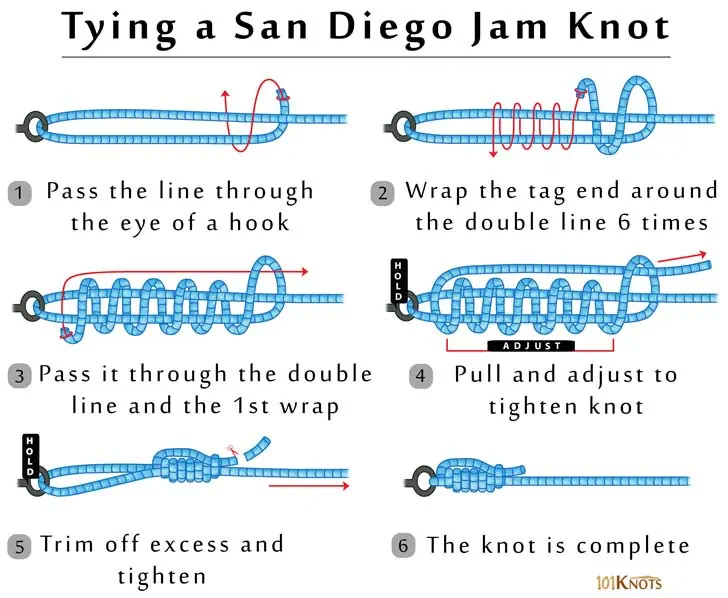
San Diego Jam Knot
San Diego Jam
Big glide baits stress knots on casts, chops, and boatside surges
Retie often; check the first few feet after every fish, backlash, dock hit, or hard cast. Tie the jam only to a split ring or heavy snap — a bare fixed line tie chokes the glide.
Line-Through Rigging: What It Is and Why It Matters
Rigging feature — look for it on bigger, more expensive baits
Some big glide baits and soft swimbaits skip the fixed line tie entirely. Instead, your line runs through a tube molded through the body of the bait, and you tie directly to a treble hook that seats against the belly. This is called line-through rigging, and it solves the biggest problem in big-bait fishing: losing fish during the fight. With a standard fixed-hook glide bait, a hooked fish can use the weight and length of the bait itself as a lever to pry the hooks free — especially when it jumps. On a line-through bait, the body slides up the line the moment a fish is hooked. The fish is left fighting only the hook, with nothing to lever against. Landing ratios go up noticeably, and the bait itself takes less damage from teeth and thrashing since it's out of the fish's mouth during most of the fight. The trade-off is action. A fixed joint and rigid line tie give hard glide baits their wide, precise S-glide. Line-through baits — most of them soft-bodied — tend to glide a little less crisply and depend more on rod input. Retie often, too: the line running through the body tube and against the hook eye takes abrasion you can't see. You don't need to seek out line-through baits as a separate technique. Treat it as a rigging feature to look for when you're shopping bigger, more expensive baits — particularly soft glides and trophy-class swimbaits where a thrown hook hurts the most. The Savage Gear Soft Shine Glide 7" covered in the Soft Glide Baits guide is a line-through design, if you want to feel the difference without a big spend.
Where to Throw Each
Points
Cast across the crown and down both sides. Let fish pin the bait against the break.
Bluffs
Parallel steep rock and shade lines where bass can rise from deep water.
Wood
Throw past laydowns and stumps, then bring the bait into the strike window.
Docks
Use a chopper-style bait around floats, posts, and shade corners.
Wind Banks
Wind and chop hide the bait and make followers more willing to commit.
Bait Zones
Shad spawn, herring activity, bluegill edges, and shallow cruisers are prime.
Cheat Sheet
Learning the technique
S-Waver 168S or Chad Shad in Bone.
Covering water
6th Sense Draw or S-Waver — wide sweeps.
Docks / wood / followers
SPRO KGB Chad Shad — chopper action.
Bigger profile / slower target work
Bucca Trick Shad — slow natural.
Clear pressured fish
Natural shad color and a cleaner cadence.
Wind and chop
Bone, Pearl, or flash shad with a faster retrieve.
Shop the recommended gear, lures, and trailers
9 hand-picked items for this technique